tutorial
Interface an LCD With an Arduino
LCD stands for Liquid Crystal Display.
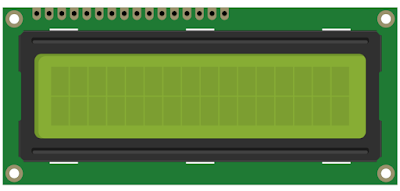
The Liquid Crystal library allows you to control LCD displays that are compatible with the Hitachi HD44780 driver. There are many of them out there, and you can usually tell them by the 16-pin interface.
The LCDs have a parallel interface, meaning that the microcontroller has to manipulate several interface pins at once to control the display. The interface consists of the following pins:
1. Power Supply pins (Vss/Vcc): Power the LCD
2. Contrast pin (Vo): Control the display contrast
3. Register Select (RS) pin: Controls where in the LCD's memory you're writing data to.
4. Read/Write (R/W): Selects reading mode or writing mode
5. Enable pin: Enables writing to the registers
6. 8 data pins (D0 -D7): The states of these pins (high or low) are the bits that you're writing to a register when you write or the values you're reading when you read.
7. Backlight (Bklt+ and BKlt-) pins: Turn on/off the LED backlight
Note:
The Hitachi-compatible LCDs can be controlled in two modes: 4-bit or 8-bit. The 4-bit mode requires seven I/O pins from the Arduino, while the 8-bit mode requires 11 pins.
For displaying text on the screen, you can do most everything in 4-bit mode
The lcd.begin(16,2) command set up the LCD number of columns and rows. For example, if you have an LCD with 20 columns and 4 rows (20x4) you will have to change this to lcd.begin(20x4).
The lcd.print("--message--") command print a message to the first column and row of LCD display. The "message" must have a maximum length equal to LCD columns number. For example, for 16 columns display max length is equal with 16 and for 20 columns display max length is equal with 20.
The lcd.setCursor(0,1) command will set the cursor to the first column of the second row. If you have an LCD 20x4 and you want to print a message to column five and third row you have to use: lcd.setCursor(4,2).
Connection Diagram:
Schematic Diagram:
Code:
/*
LiquidCrystal Library - Hello World
Demonstrates the use a 16x2 LCD display. The LiquidCrystal
library works with all LCD displays that are compatible with the
Hitachi HD44780 driver. There are many of them out there, and you
can usually tell them by the 16-pin interface.
This sketch prints "Hello World!" to the LCD
and shows the time.
The circuit:
* LCD RS pin to digital pin 12
* LCD Enable pin to digital pin 11
* LCD D4 pin to digital pin 5
* LCD D5 pin to digital pin 4
* LCD D6 pin to digital pin 3
* LCD D7 pin to digital pin 2
* LCD R/W pin to ground
* LCD VSS pin to ground
* LCD VCC pin to 5V
* 10K resistor:
* ends to +5V and ground
* wiper to LCD VO pin (pin 3)
*/
// include the library code:
#include <LiquidCrystal.h>
// initialize the library by associating any needed LCD interface pin
// with the arduino pin number it is connected to
const int rs = 12, en = 11, d4 = 5, d5 = 4, d6 = 3, d7 = 2;
LiquidCrystal lcd(rs, en, d4, d5, d6, d7);
void setup() {
// set up the LCD's number of columns and rows:
lcd.begin(16, 2);
// Print a message to the LCD.
lcd.print("hello, world!");
}
void loop() {
// set the cursor to column 0, line 1
// (note: line 1 is the second row, since counting begins with 0):
lcd.setCursor(0, 1);
// print the number of seconds since reset:
lcd.print(millis() / 1000);
}
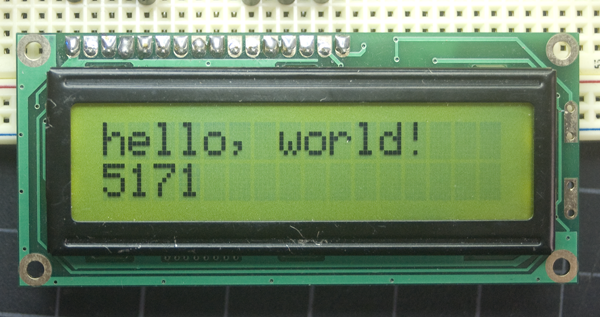
Output:
This will print Hello world on the LCD, and also print the no of seconds it is inactive.

Reference:
1. LiquidCrystal Library: This library allows an Arduino board to control liquid crystal displays (LCDs) based on the Hitachi HD44780 (or a compatible) chipset, which is found on most text-based LCDs. The library works within either 4- or 8-bit mode (i.e. using 4 or 8 data lines in addition to the rs, enable, and, optionally, the rw control lines).2. begin(): Initializes the interface to the LCD screen, and specifies the dimensions (width and height) of the display. begin() needs to be called before any other LCD library commands.
4. setCursor(): Position the LCD cursor; that is, set the location at which subsequent text written to the LCD will be displayed.
5. Text Direction methods
rightToLeft() causes text to flow to the left from the cursor as if the display is right-justified.
leftToRight() causes text to flow to the right from the cursor as if the display is left-justified.
6. autoscroll() method:
autoscroll() moves all the text one space to the left each time a letter is added
noAutoscroll() turns scrolling off


No comments:
Post a Comment